
Fix “A Media Driver Your Computer Needs Is Missing”
What "A media driver your computer needs is missing" really means during Windows setup, the quick fixes to try first and how to load the driver from a second USB stick.
 Mohammad Shojib AhmedUpdated · 6 min read · 844K views
 2:59 video
Key takeaway
Put the driver on a second USB stick and keep it plugged in until setup finishes.
Quick answer: On another PC, download the correct storage-controller F6 driver for your hardware. Extract it onto a second USB stick, boot Windows Setup with both USB drives connected, and choose Load driver → Browse if the disk is not detected automatically.
If Windows Setup stops with “A media driver your computer needs is missing,” it may not be able to access a storage controller or the installation media. This guide follows the two-USB-drive solution shown in my video: download the appropriate driver on another computer, extract it onto a second USB drive, then return to Windows Setup. The video demonstrates Intel Rapid Storage Technology (RST) on a particular PC; the same driver will not work on every computer.
Before you begin
The video shows an older Intel download page and the file f6flpy-x64.zip. Do not assume that historical package works with your PC. Check your exact computer or motherboard model and storage controller first. Prefer the manufacturer’s current F6 / RST / VMD driver. Back up important files before installing Windows, and never delete or format partitions without confirming the correct disk.
Step 1 — Identify the error in Windows Setup
In the original demonstration, Windows 10 Setup displays “A media driver your computer needs is missing” inside the Load driver dialog. The installer cannot continue normally. Close the dialog and exit Setup so you can prepare the driver on a second computer.
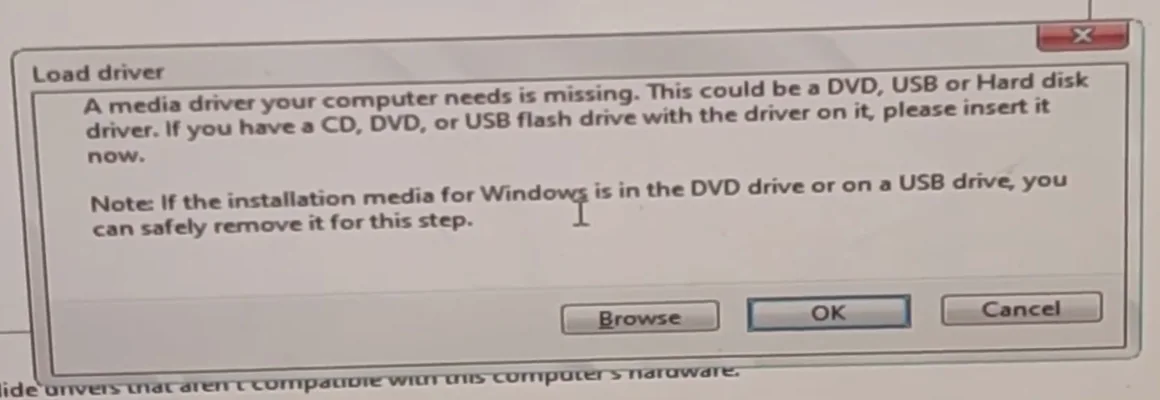
From my video at 0:20: The error in Windows Setup: “A media driver your computer needs is missing.”
Step 2 — Download a compatible storage driver on another PC
On a working computer, open the support page for the PC or motherboard model and look for an appropriate storage controller driver. In the original video, I opened Intel’s RST download page and selected the third file, f6flpy-x64.zip. That file and page reflect the video’s older setup, not a universal recommendation. Newer Intel systems may require a different RST/VMD F6 package. Follow the current instructions for your exact hardware.
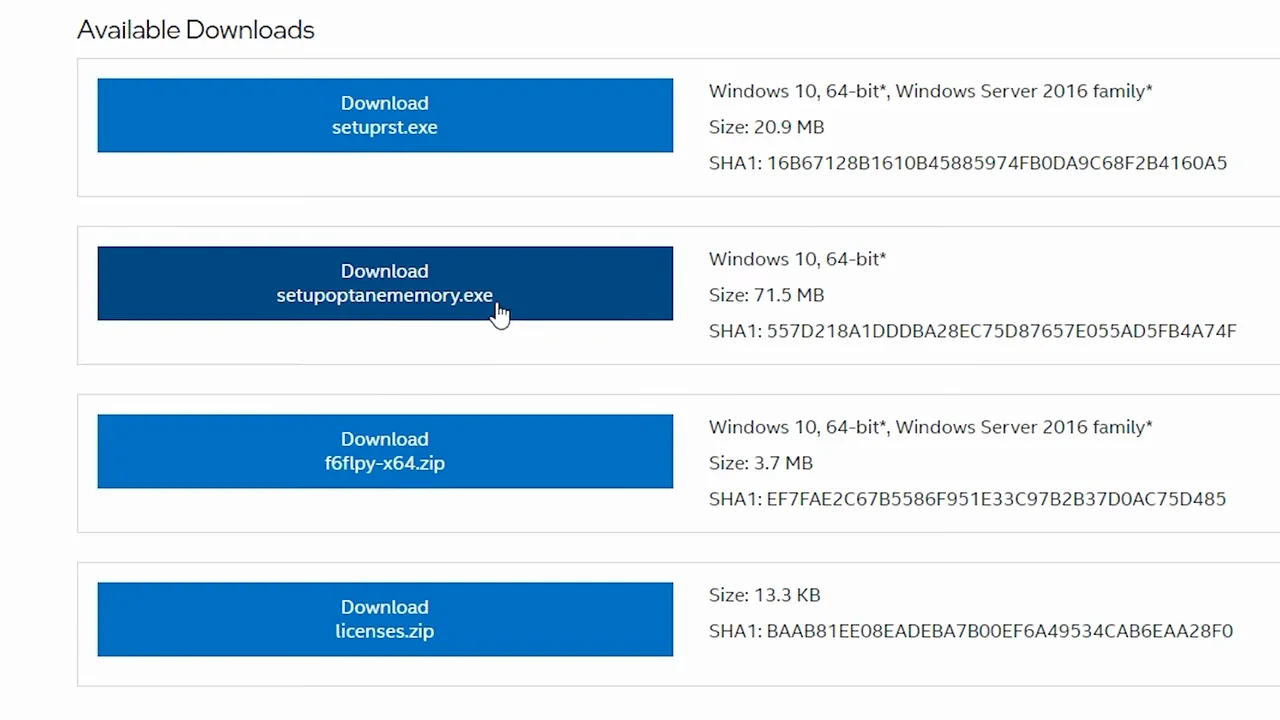
From my video at 0:49: The Intel download page with the f6flpy-x64.zip driver package.
Step 3 — Copy and extract the driver onto a second USB drive
Connect a separate USB flash drive to the working PC. Copy the downloaded F6 driver archive onto it, then extract the archive. Keep the extracted folder structure intact; Windows Setup needs the driver files, not just the ZIP. The original video uses two separate drives: one bootable Windows installer and one holding the extracted driver.
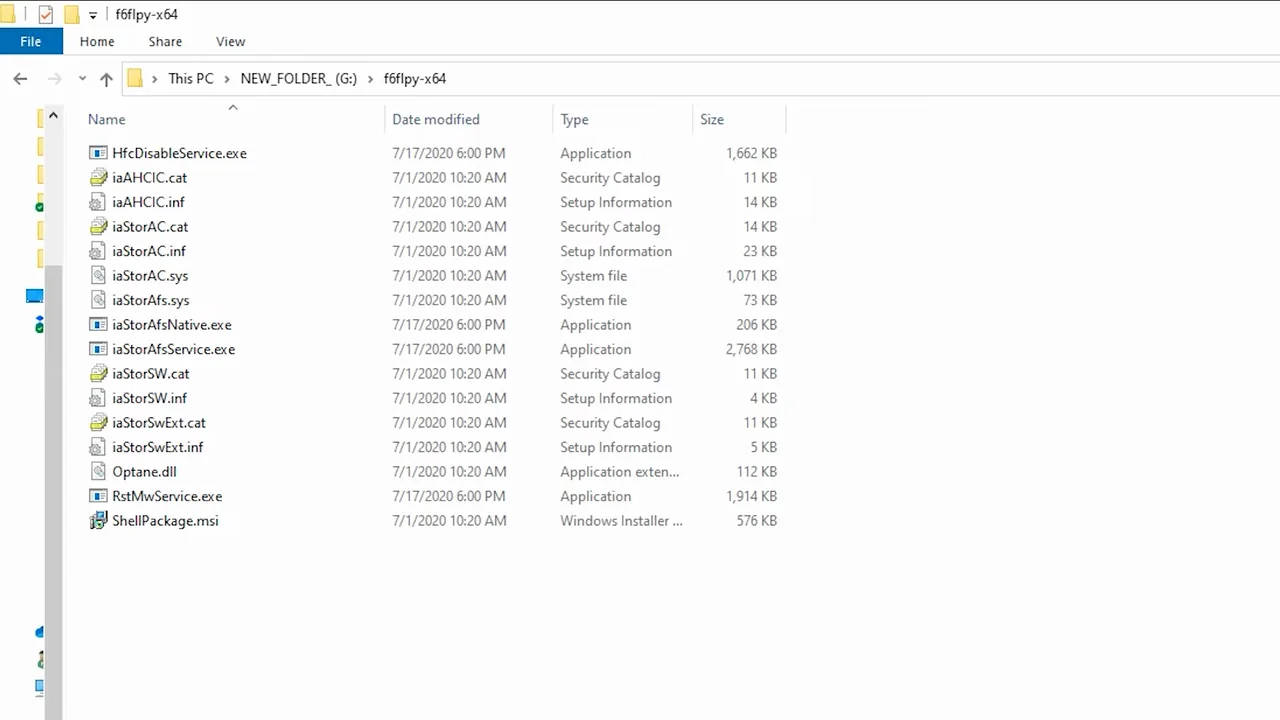
From my video at 1:40: The extracted driver files on the second USB drive.
Step 4 — Connect both USB drives and restart Setup
Insert the Windows installation USB and the second USB containing the driver into the target PC. Boot again from the Windows installer. In the video, Setup detected the needed hardware after rebooting with the driver USB attached. On other computers, automatic detection may not occur, so use the manual method below.
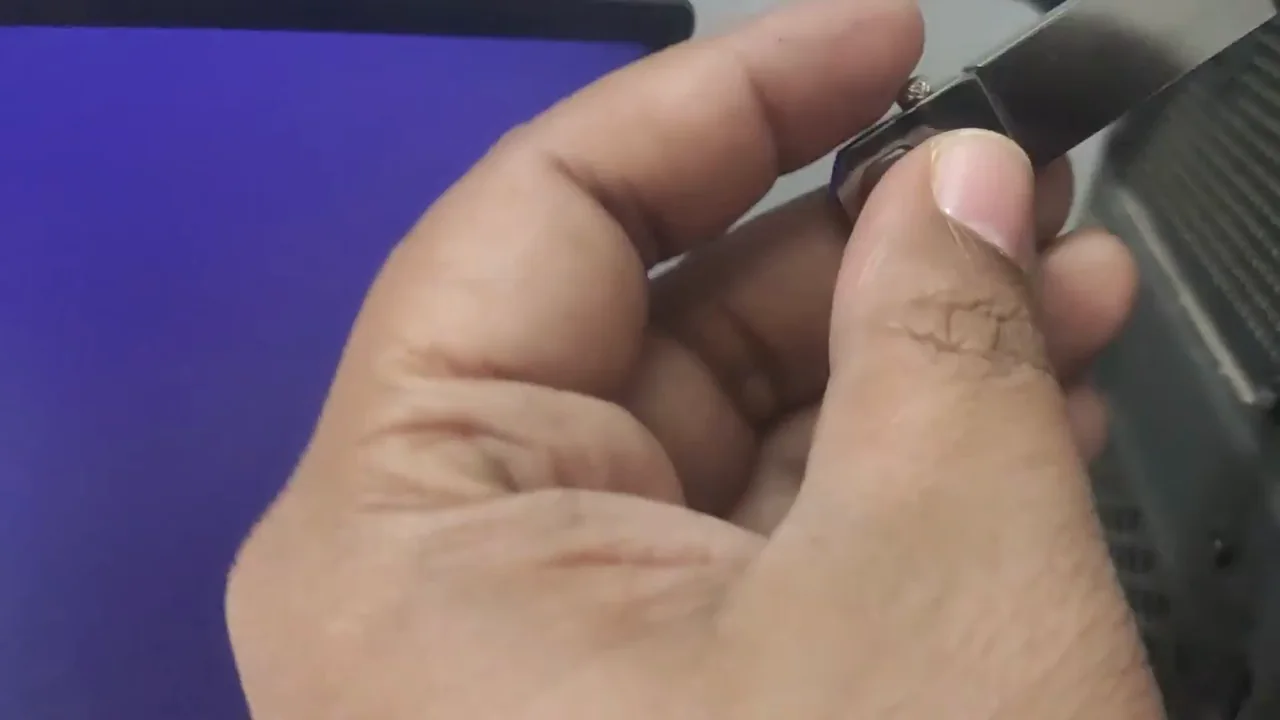
From my video at 1:48: Plugging in the second USB drive.
Step 5 — Load the driver manually if Setup still cannot see the disk
On the disk-selection screen, choose Load driver, then Browse. Navigate to the extracted driver folder on the second USB, choose the compatible controller driver, and continue. If no compatible driver is listed, stop and obtain the correct package for the motherboard, VMD/RAID configuration, and Windows version. Do not randomly change BIOS storage modes to force detection.
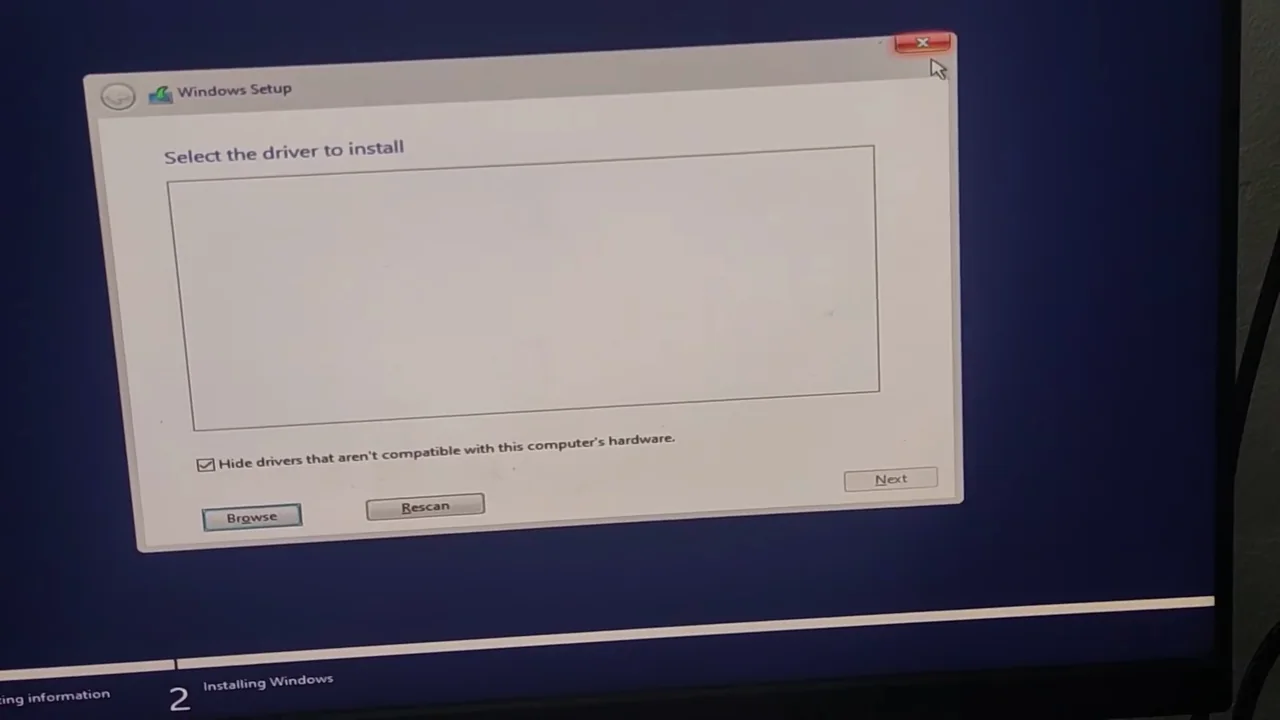
From my video at 0:27: Windows Setup’s “Select the driver to install” screen.
Step 6 — Verify the disk appears, then continue
You should now be able to see the target storage device on “Where do you want to install Windows?” In the video, the drive appears and installation proceeds. Keep the second USB connected while Setup needs the driver. Confirm the target disk and partitions carefully before clicking Next; formatting or deleting partitions can erase data.
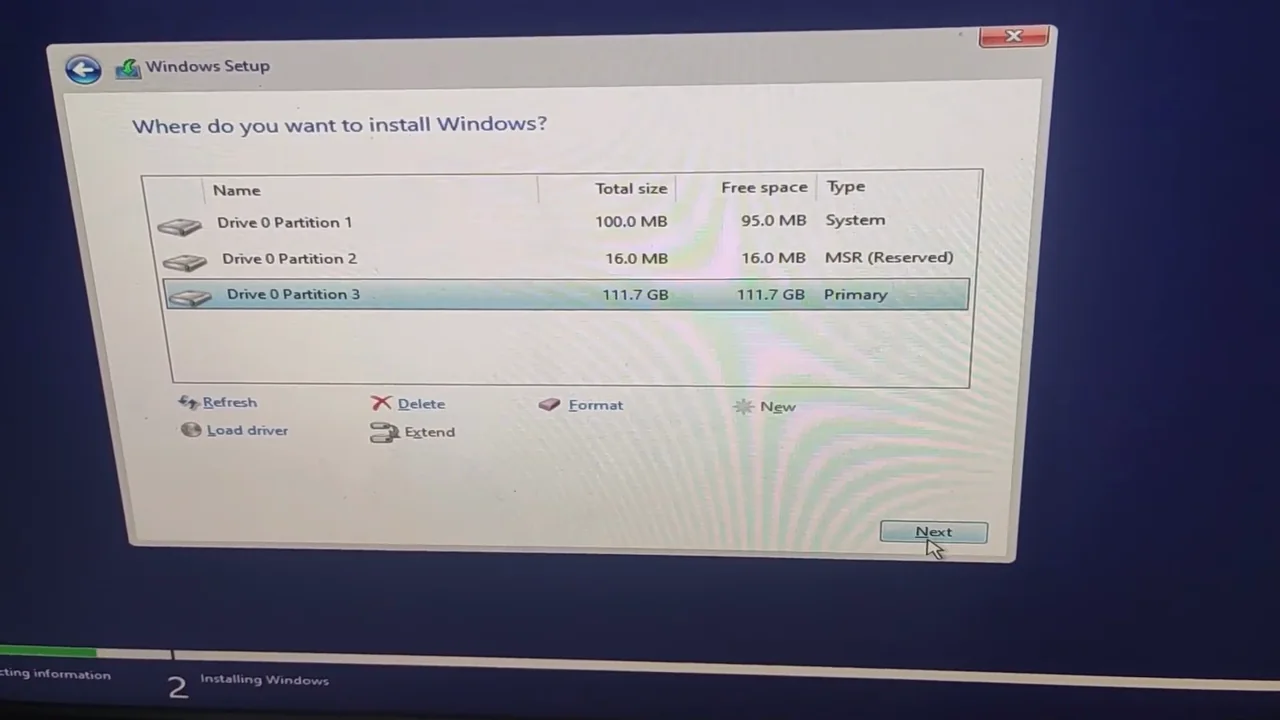
From my video at 2:46: The drive now appears under “Where do you want to install Windows?”
If the error is still there
Try another USB port, and recreate the Windows installation USB using official Microsoft installation media if the installer may be damaged. Check whether the machine uses Intel RST/VMD, RAID, or a different controller and download the matching driver from its manufacturer. If a suitable driver still does not load, check the system maker’s support instructions before changing firmware settings.
Which cause is yours? If setup stops before you can choose a drive and the USB was made with a third-party tool or copied by hand, suspect the installation media: recreate it with Microsoft’s Media Creation Tool. If the error changes when you use another port (for example a USB 2.0 port instead of a front-panel or USB 3.x port), suspect the USB port or controller. If setup runs but shows no drives to install to, it is almost always a missing storage controller driver, the fix shown in the video. On many laptops with 11th-generation Intel processors or newer, that is the Intel RST/VMD driver; on other PCs it comes from the PC or motherboard maker.
Common questions
Can I turn off VMD or RAID instead of loading a driver?
Only if your PC or motherboard maker documents it for your model. Changing the storage mode can stop an existing Windows install from starting, so loading the right driver is usually safer.
Can I use the same driver file as in the video?
Not blindly. The file in the video is for that PC. Get the current driver for your own model. See before you begin.
Final precaution
This method is most relevant when the missing driver belongs to the computer’s storage controller. The message can also have other causes. The Intel page and file shown in the video are historical references; never install an incompatible driver just because its name matches the tutorial.
Tools & files from this guide
Keep going