
How to Enable Secure Boot for Windows 11
What Secure Boot and its keys are, the two BIOS rounds that turn it on for Windows 11 and Valorant on MSI boards, and the settings on ASUS, Gigabyte and ASRock.
 Mohammad Shojib AhmedUpdated · 7 min read · 206K views
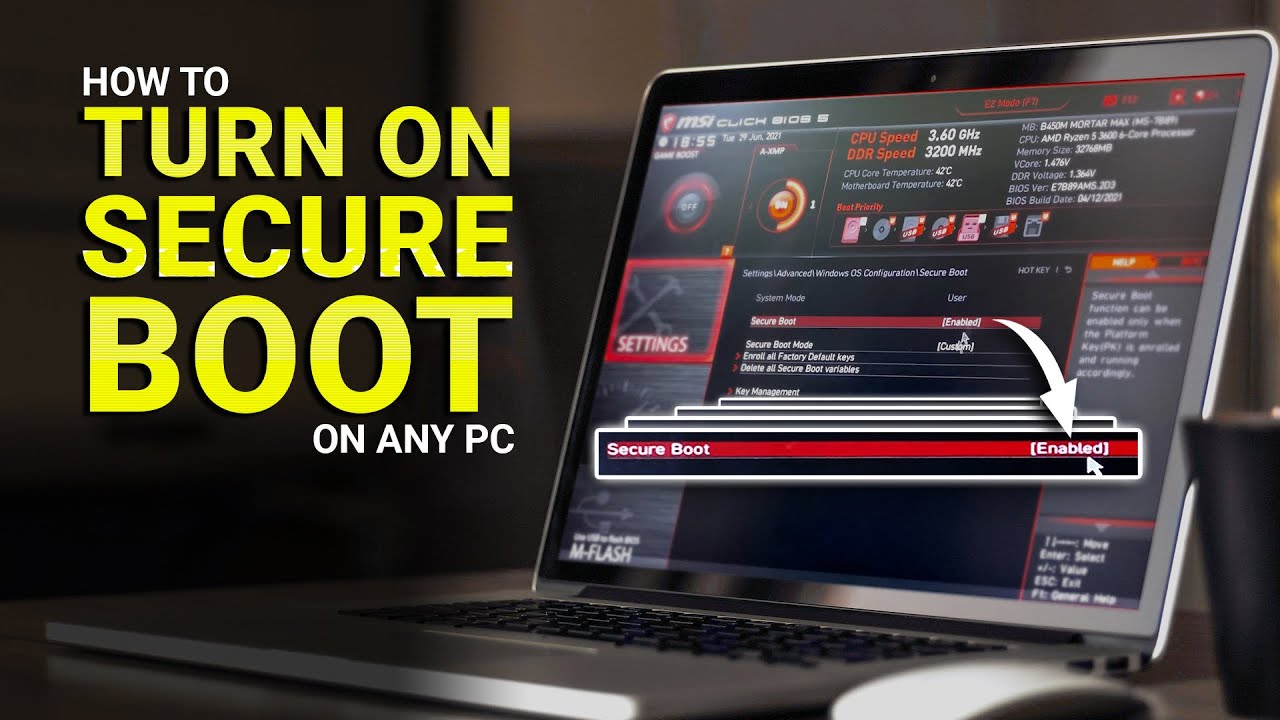 3:06 video
Key takeaway
Your drive must be GPT first. Then set UEFI, enroll the factory keys and enable Secure Boot.
Secure Boot helps protect your computer during startup by allowing trusted boot software to load. If Windows 11 or a game such as VALORANT reports that Secure Boot is off, you may need to enable it in your motherboard's UEFI firmware.
This guide follows an actual MSI Click BIOS 5 demonstration on an MSI B450M MORTAR MAX. Other BIOS versions may use different names and menus. The procedure may involve several restarts.
Quick answer: First confirm Windows is already booting in UEFI mode and that its system disk is compatible. Then enter BIOS, select UEFI instead of Legacy/CSM, enroll the factory Secure Boot keys if prompted, save and restart, and finally enable Secure Boot. Verify the result in Windows using
msinfo32.
Before changing BIOS settings
Do not switch a working Windows installation from Legacy/CSM to UEFI blindly. If Windows was installed for legacy BIOS boot from an MBR-partitioned disk, changing the boot mode may prevent it from starting. You may need to convert the system disk to GPT first, following a verified procedure and with a backup.
- Press Windows + R, enter
msinfo32, and check BIOS Mode. If it already says UEFI, that is a good starting point. - Check the system disk partition style in Disk Management → disk Properties → Volumes (choose the disk, not an individual volume). For a normal Windows UEFI installation, the system disk should use GPT.
- Back up important files and keep your BitLocker/device encryption recovery key available, if encryption is active.
- Take photographs of any BIOS settings you change. Do not alter unrelated settings, particularly storage-controller, overclocking, or boot-order settings.
These instructions are specific to the reference motherboard. If your settings differ, consult your motherboard manufacturer's instructions rather than guessing.
Step 1 — Restart and open MSI Click BIOS 5
In Windows, choose Start → Power → Restart. As the computer starts, press Delete repeatedly until the MSI BIOS appears. If BIOS opens in EZ Mode, press F7 to switch to Advanced Mode.
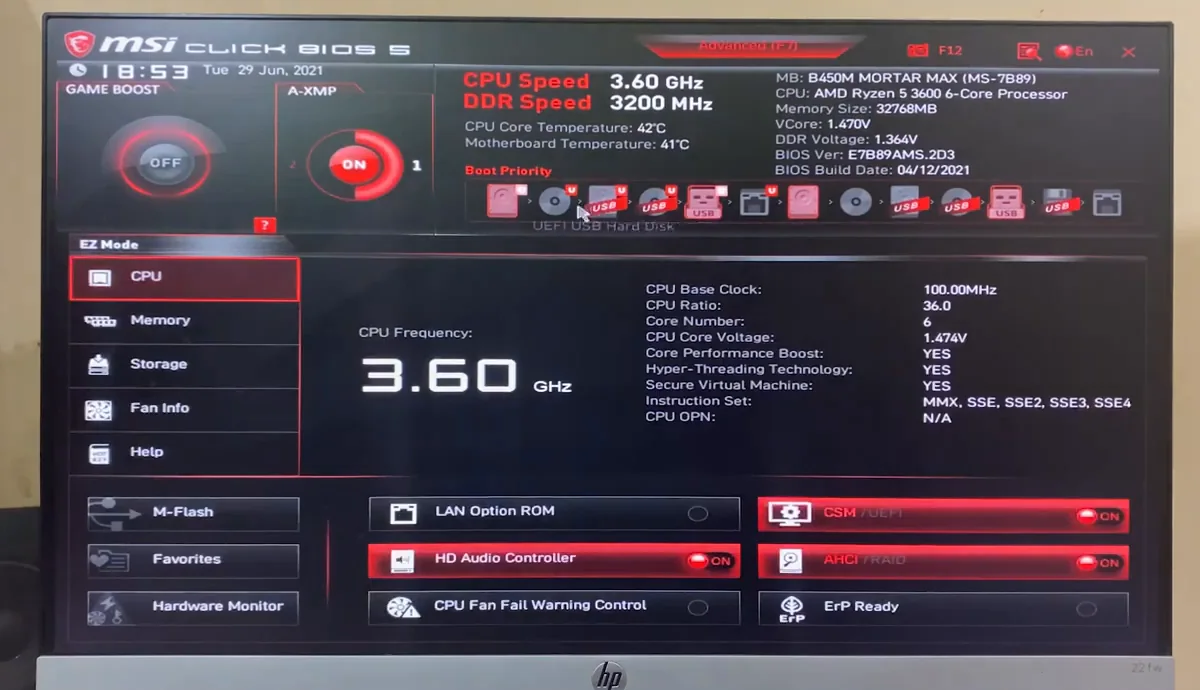
From my video at 0:35: MSI Click BIOS 5 in EZ Mode, as it opened after pressing Delete at startup.
Step 2 — Select UEFI boot mode
Open Settings → Boot. In the recording, Boot mode select initially reads LEGACY+UEFI. Set it to UEFI only after confirming that your Windows installation supports UEFI boot.
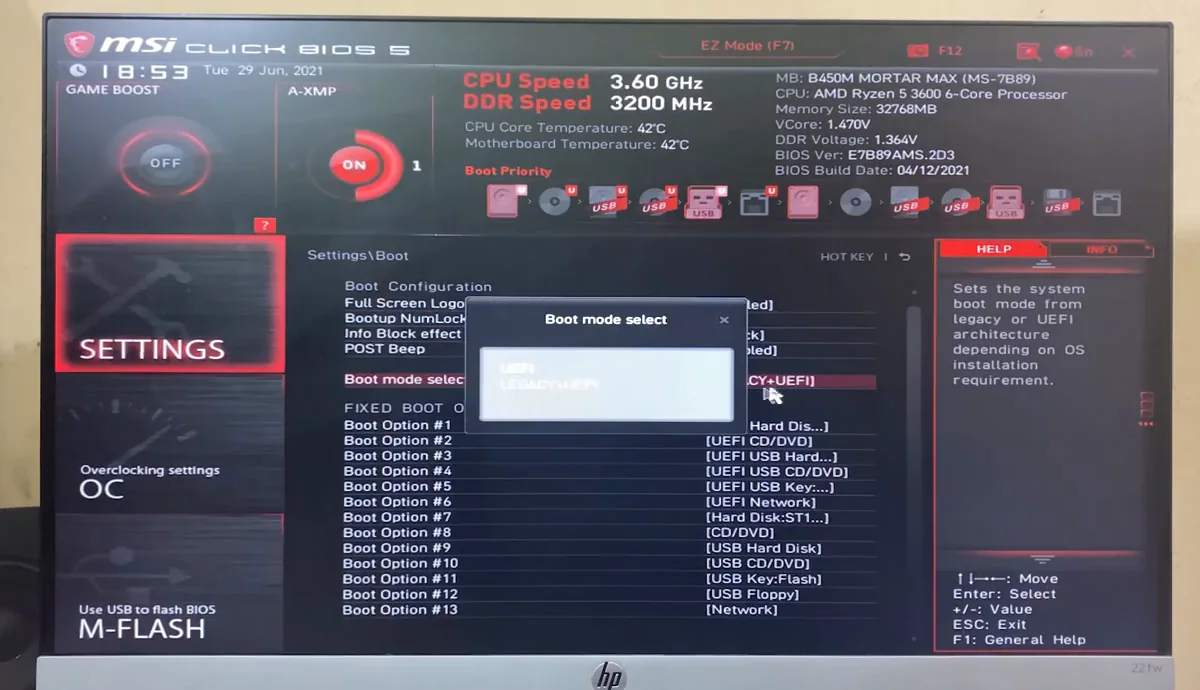
From my video at 0:43: Settings → Boot, with the Boot mode select list open; the current value is LEGACY+UEFI.
Next open Settings → Advanced → Windows OS Configuration. Change BIOS UEFI/CSM Mode to UEFI if that option appears in your firmware.
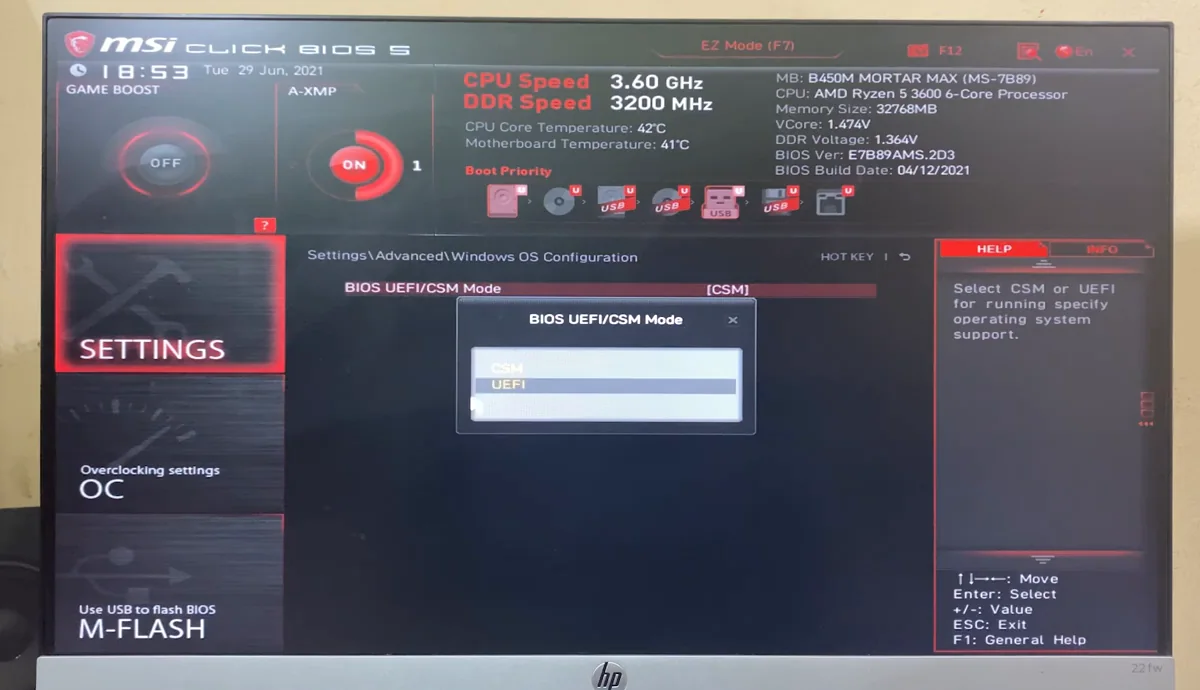
From my video at 0:51: Settings → Advanced → Windows OS Configuration, choosing UEFI in the BIOS UEFI/CSM Mode list.
Step 3 — Enroll the factory Secure Boot keys
From Settings → Advanced → Windows OS Configuration, open Secure Boot. In the demonstration, the first attempt to enable Secure Boot produces a warning that a Platform Key (PK) must be enrolled first.
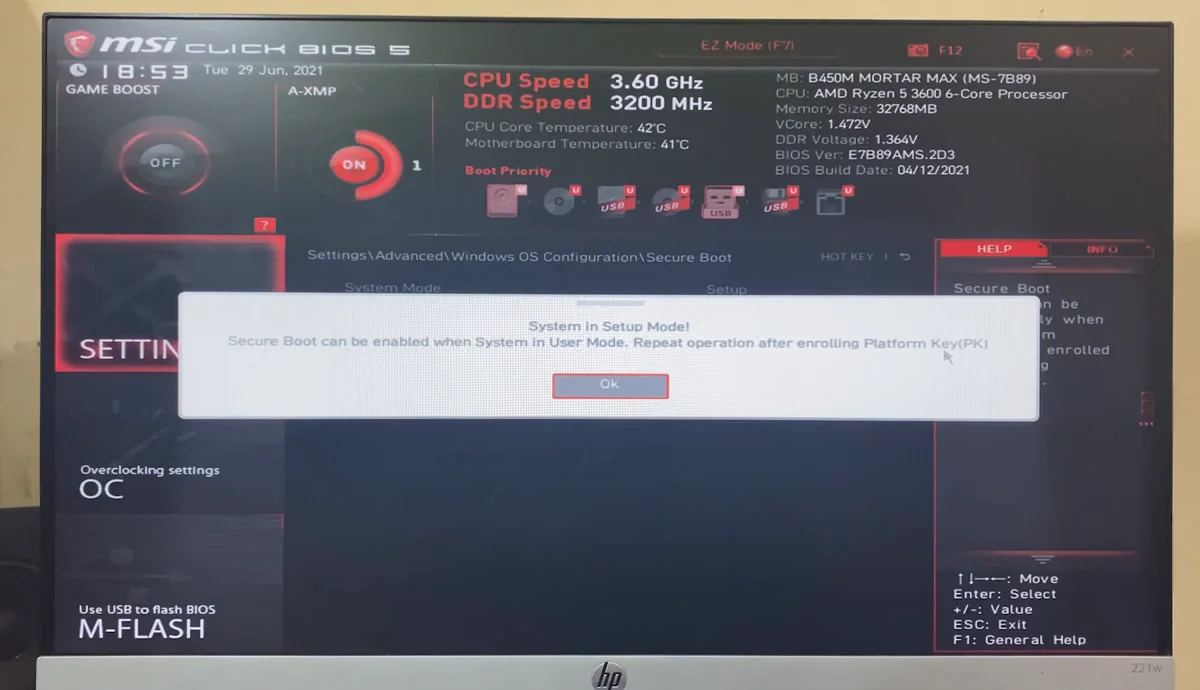
From my video at 0:58: The first attempt: “System in Setup Mode! Secure Boot can be enabled when System in User Mode.”
Choose Enroll all Factory Default Keys, then confirm Yes. This installs the firmware's factory trust keys; do not select the neighboring option that deletes Secure Boot variables.
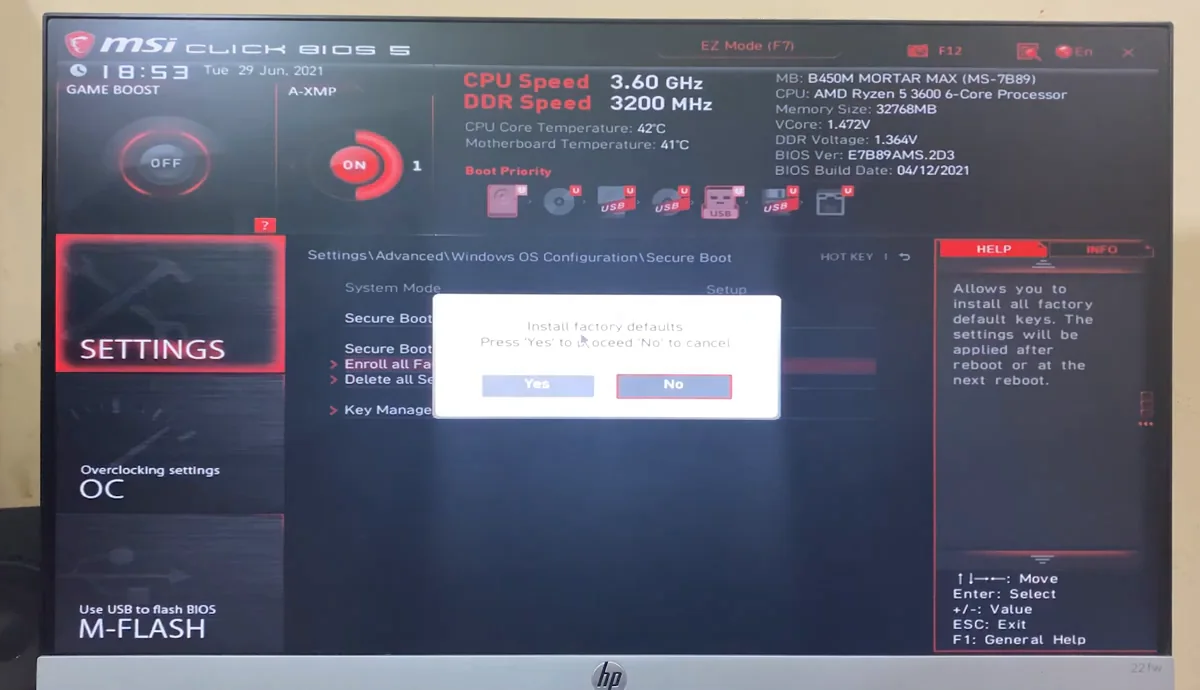
From my video at 1:06: The “Install factory defaults” confirmation that appears after choosing Enroll all Factory Default keys.
Press F10 to save, confirm, and let the computer restart. This is an expected part of the demonstrated process.
Step 4 — Resolve the CSM warning, if it appears
Open BIOS again with Delete, return to Windows OS Configuration → Secure Boot, and try enabling the option. In the recording, the motherboard warns that CSM is loaded and asks for another restart before the UEFI graphics environment is active.
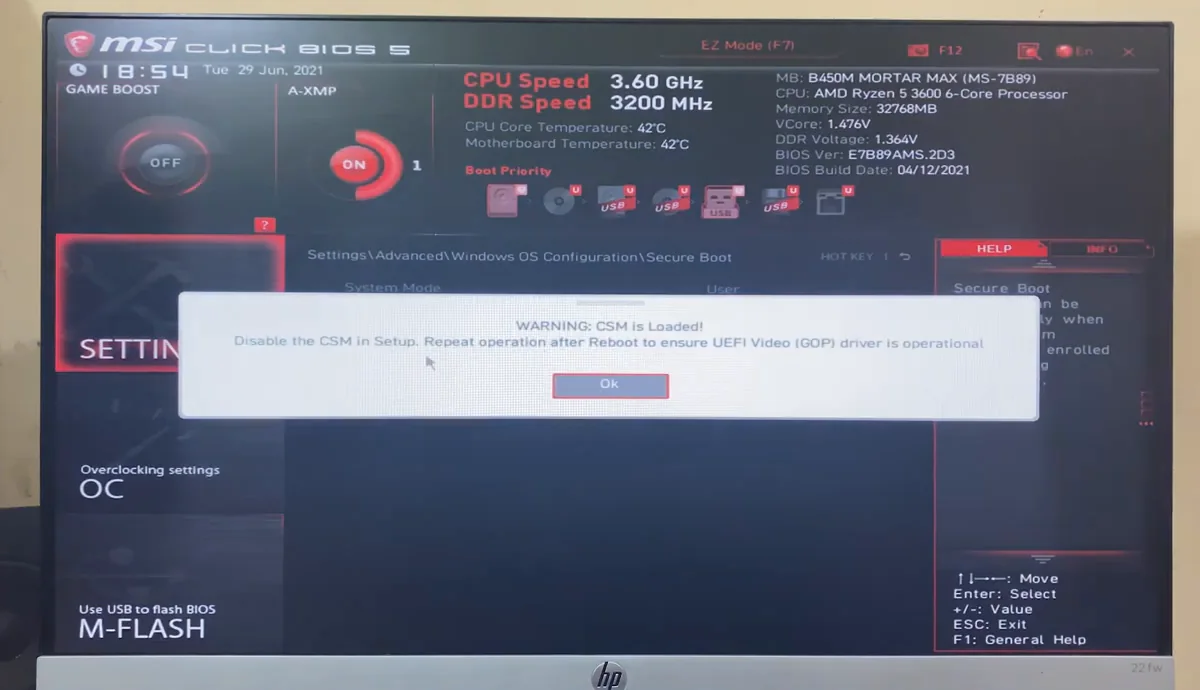
From my video at 1:44: “WARNING: CSM is Loaded!”, asking for a restart before Secure Boot can be enabled.
Press F10 to save and restart again. If Windows does not boot normally after the mode change, stop and restore the previous settings or follow a suitable UEFI migration guide before proceeding.
Step 5 — Enable Secure Boot and verify
Enter BIOS again, open Settings → Advanced → Windows OS Configuration → Secure Boot, and set Secure Boot to Enabled. In the demonstration, the BIOS now displays System Mode: User and Secure Boot: Enabled.
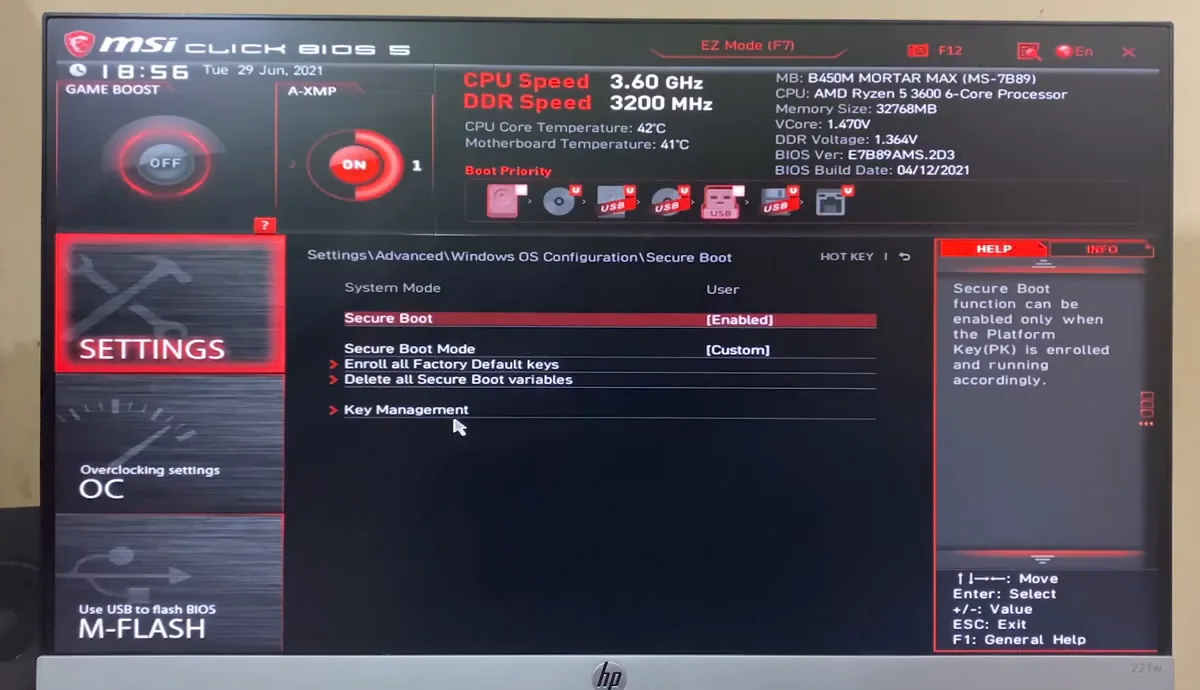
From my video at 2:37: The final state: System Mode: User and Secure Boot: Enabled.
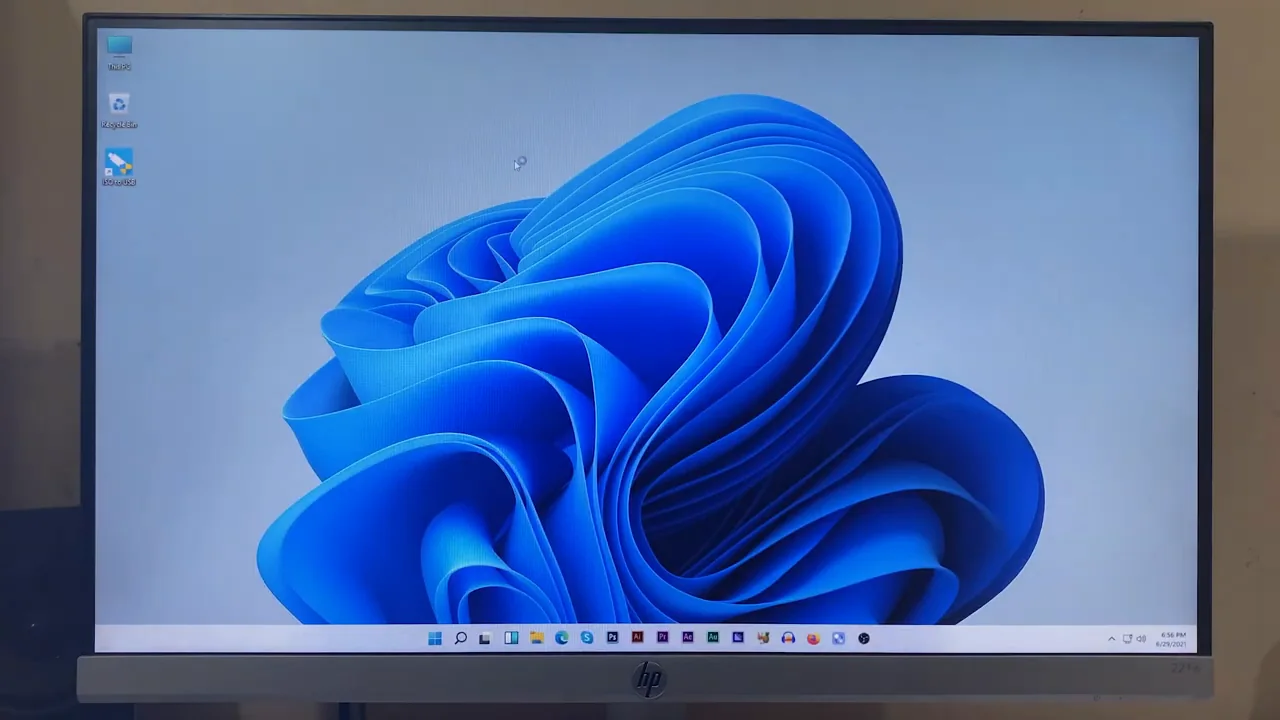
From my video at 2:52: Windows started normally after saving the change.
Press F10, confirm the changes, and let Windows start. To verify from Windows, press Windows + R, type msinfo32, and confirm:
- BIOS Mode: UEFI
- Secure Boot State: On
These Windows checks are more useful than simply seeing an enabled toggle in the firmware. If the values do not match, troubleshoot before assuming Secure Boot is active.
Troubleshooting
Secure Boot is grayed out or reports a missing Platform Key. Check that the system is running in UEFI mode, then enroll the factory default keys through the appropriate Secure Boot/Key Management menu.
“CSM is loaded” appears. Save the firmware's UEFI-mode settings and restart if the board instructs you to. Recheck the setting afterward.
Windows stops booting after switching modes. Restore the previous boot mode if necessary and check whether Windows was installed in Legacy/MBR mode. Do not format or erase the drive as a quick fix.
BIOS says Enabled, but Windows says Off. Check msinfo32 again, verify UEFI mode, and consult your board's firmware documentation. Secure Boot keys and operating mode may need attention.
Different motherboard brand? The same concepts apply, but the menu paths shown here are specifically for MSI Click BIOS 5; do not assume an identical sequence on ASUS, Gigabyte, or ASRock.
Official guidance: Microsoft: Secure Boot
Common questions
Do I need Secure Boot for Windows 11?
Windows 11 requires a Secure Boot–capable PC, and Microsoft recommends having it on. Some games’ anti-cheat, such as Valorant on Windows 11, require it to be on.
What does “System Mode: Setup” mean?
No Secure Boot keys are installed yet. Loading the factory default keys changes it to User mode, and then Secure Boot can be turned on. See Step 3.
Will enabling Secure Boot delete my files?
No. Secure Boot itself does not touch your files. Firmware changes can trigger a BitLocker recovery prompt, so have your recovery key ready.
My PC goes back to the BIOS after enabling Secure Boot. What now?
Your Windows drive is probably MBR. Here is the fix.
Final precaution
Only change the settings described above. Back up your data and recovery keys before modifying boot security. These screenshots come from a 2021 MSI BIOS demonstration, so current firmware wording or behavior may differ. If you are unsure whether your current Windows installation uses UEFI/GPT, establish that first.
Original walkthrough: Watch the NextMotion Secure Boot video.
Keep going

