How to Convert MBR to GPT Without Losing Data in 2 Minutes (Windows 11/10)
Convert an MBR data disk to GPT with MiniTool Partition Wizard Free, without deleting its partitions. Includes real screenshots, verification and important system-disk limitations.
 Mohammad Shojib AhmedUpdated · 6 min read
 Play tutorial
Key takeaway
Select the correct MBR data disk in MiniTool Partition Wizard Free, choose Convert MBR Disk to GPT Disk, apply the change, and confirm the same partitions remain.
Need to change a drive from MBR to GPT without deleting its files or partitions? In my short video, I use MiniTool Partition Wizard Free on a 1.82 TB data disk. I select the drive, queue the conversion, apply the change and confirm that the same partitions are still present when the disk reports GPT.
The conversion in the video takes only a few seconds after setup, although downloading and installing the software will take longer. The steps below are written so you can complete the process without needing to watch the video.
The process at a glance
- Download MiniTool Partition Wizard from its official website and install the Free edition.
- Open the application and identify the MBR data disk you actually want to convert.
- Choose Convert MBR Disk to GPT Disk.
- Click Apply, confirm and let the operation finish.
- Verify that the disk says GPT and its partitions remain.
Before you start: data disk versus Windows system disk
This is a data-disk tutorial. The drive demonstrated is a separate Toshiba 1.82 TB disk containing files in several NTFS partitions, not the drive currently booting Windows. MiniTool says its Free edition can convert an MBR data disk, but converting the Windows system disk requires an advanced edition. Do not assume this free workflow will convert your Windows startup disk.
- Back up important files to another drive before changing partition tables. A conversion designed to preserve data is not a guarantee against power failure, software errors or selecting the wrong disk.
- Identify the correct disk by capacity, model and partitions—not merely by Disk 0 or Disk 1, since numbering can vary.
- Close programs using the disk. If BitLocker or other encryption protects it, make sure you have its recovery key and check the product's supported workflow before changing the partition structure.
- Do not format, delete partitions or select a disk containing your active Windows installation as part of this example.
MBR and GPT are partition-table styles. Converting a separate storage drive does not, by itself, enable Secure Boot or change your computer from Legacy BIOS to UEFI. Those are separate considerations for a Windows boot disk.
Step 1: Download MiniTool Partition Wizard
Open the official MiniTool Partition Wizard download page and choose Download Freeware. Avoid installers from unofficial download sites. The video uses MiniTool Partition Wizard Free 13.9; the site's appearance or version may change.
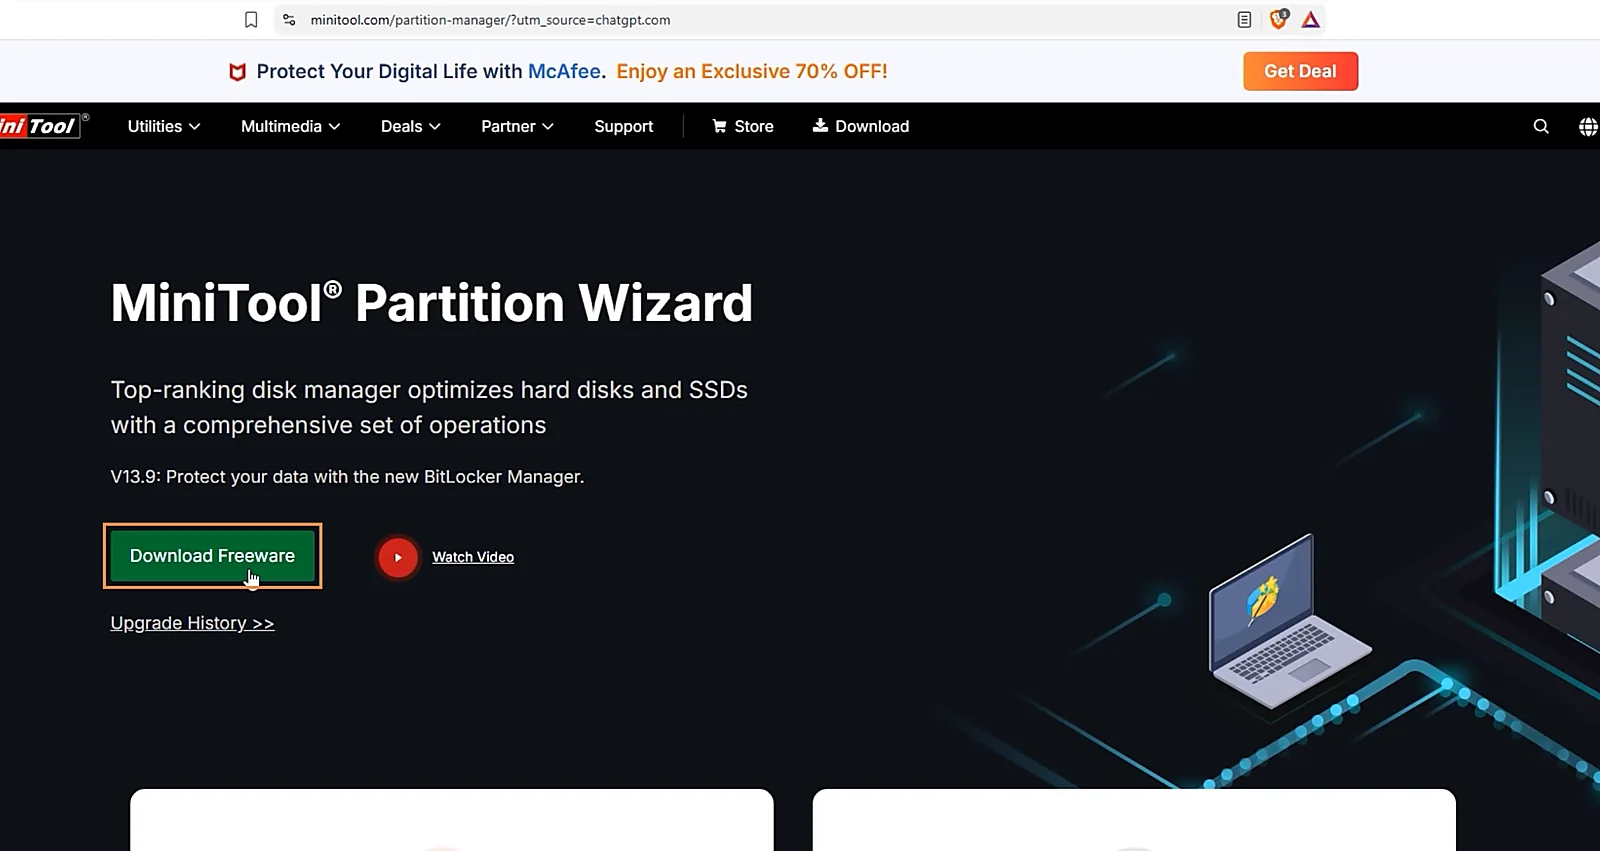
From the original recording: download the installer from the MiniTool website.
Step 2: Install the Free edition
- Open the downloaded installer and choose your setup language.
- When asked which edition to install, select Continue installing free edition. The installer shows that conversion of the OS disk is a Pro feature; this article converts a separate data disk.
- On the components page, keep MiniTool Partition Wizard Free selected. Untick any unrelated optional applications if you do not need them. You may also opt out of the customer experience program.
- Finish the installation and launch MiniTool Partition Wizard.
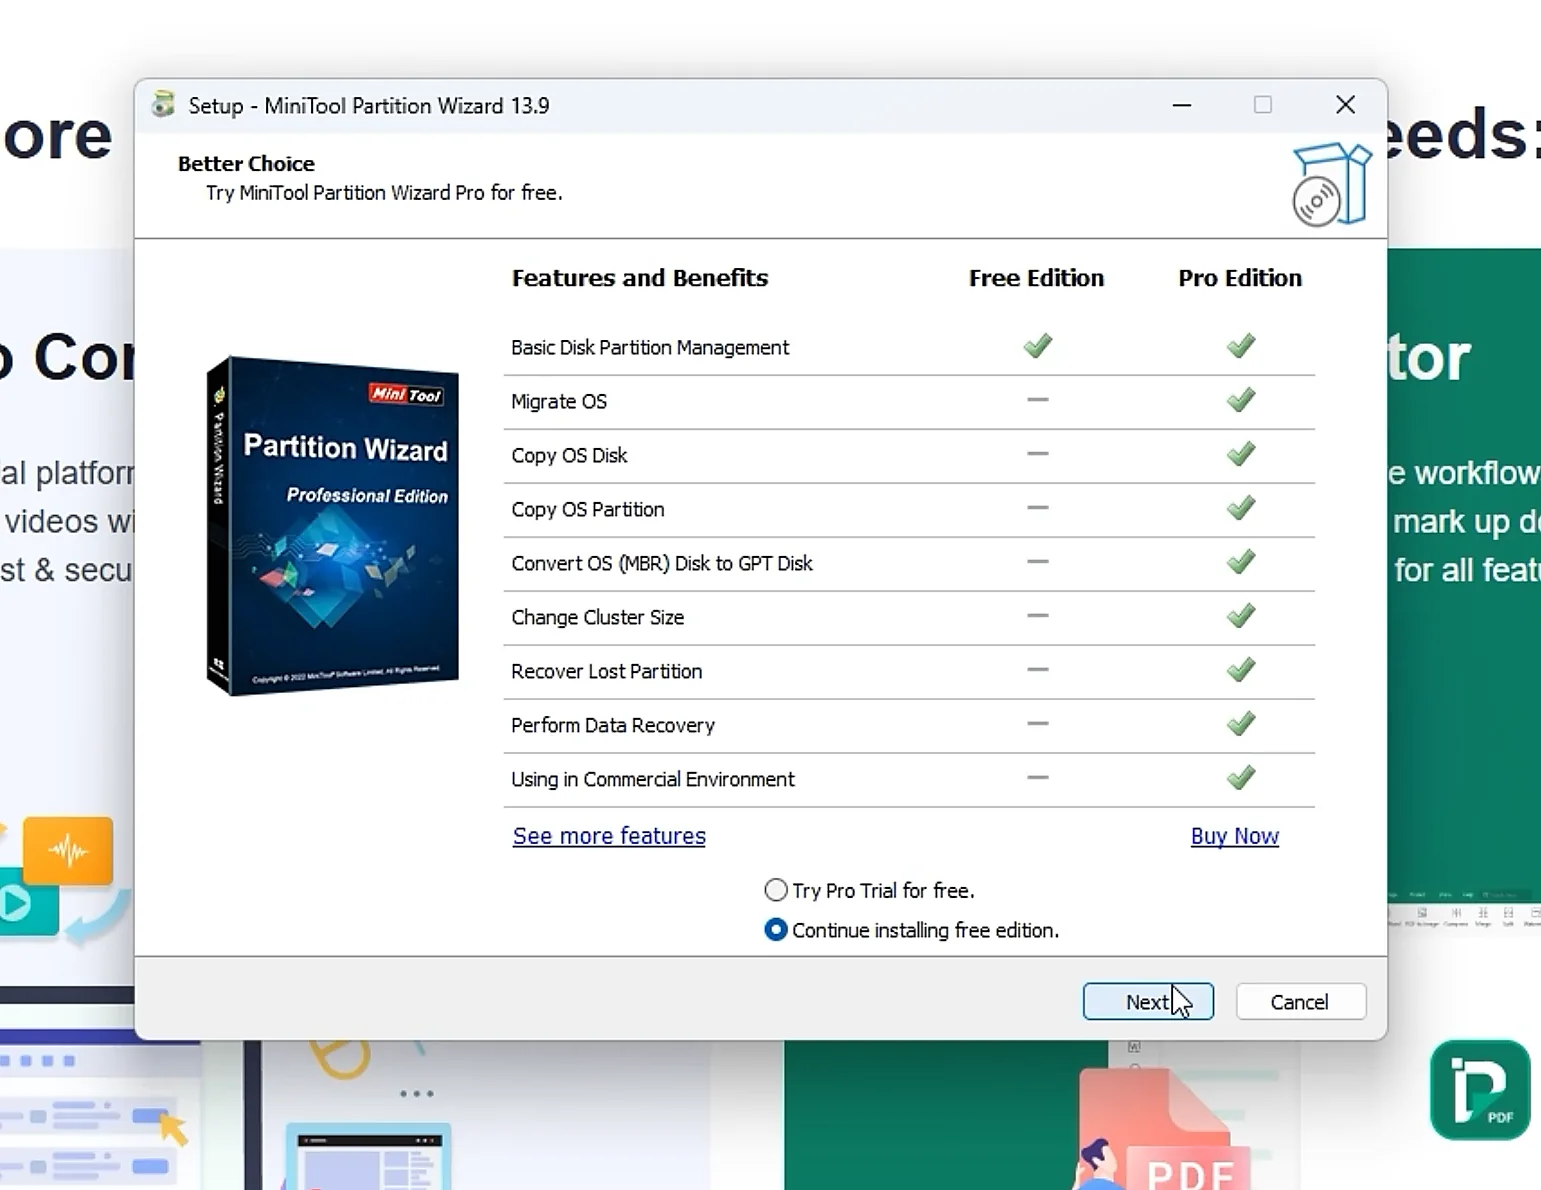
The installer comparison shows OS-disk conversion as a Pro feature.
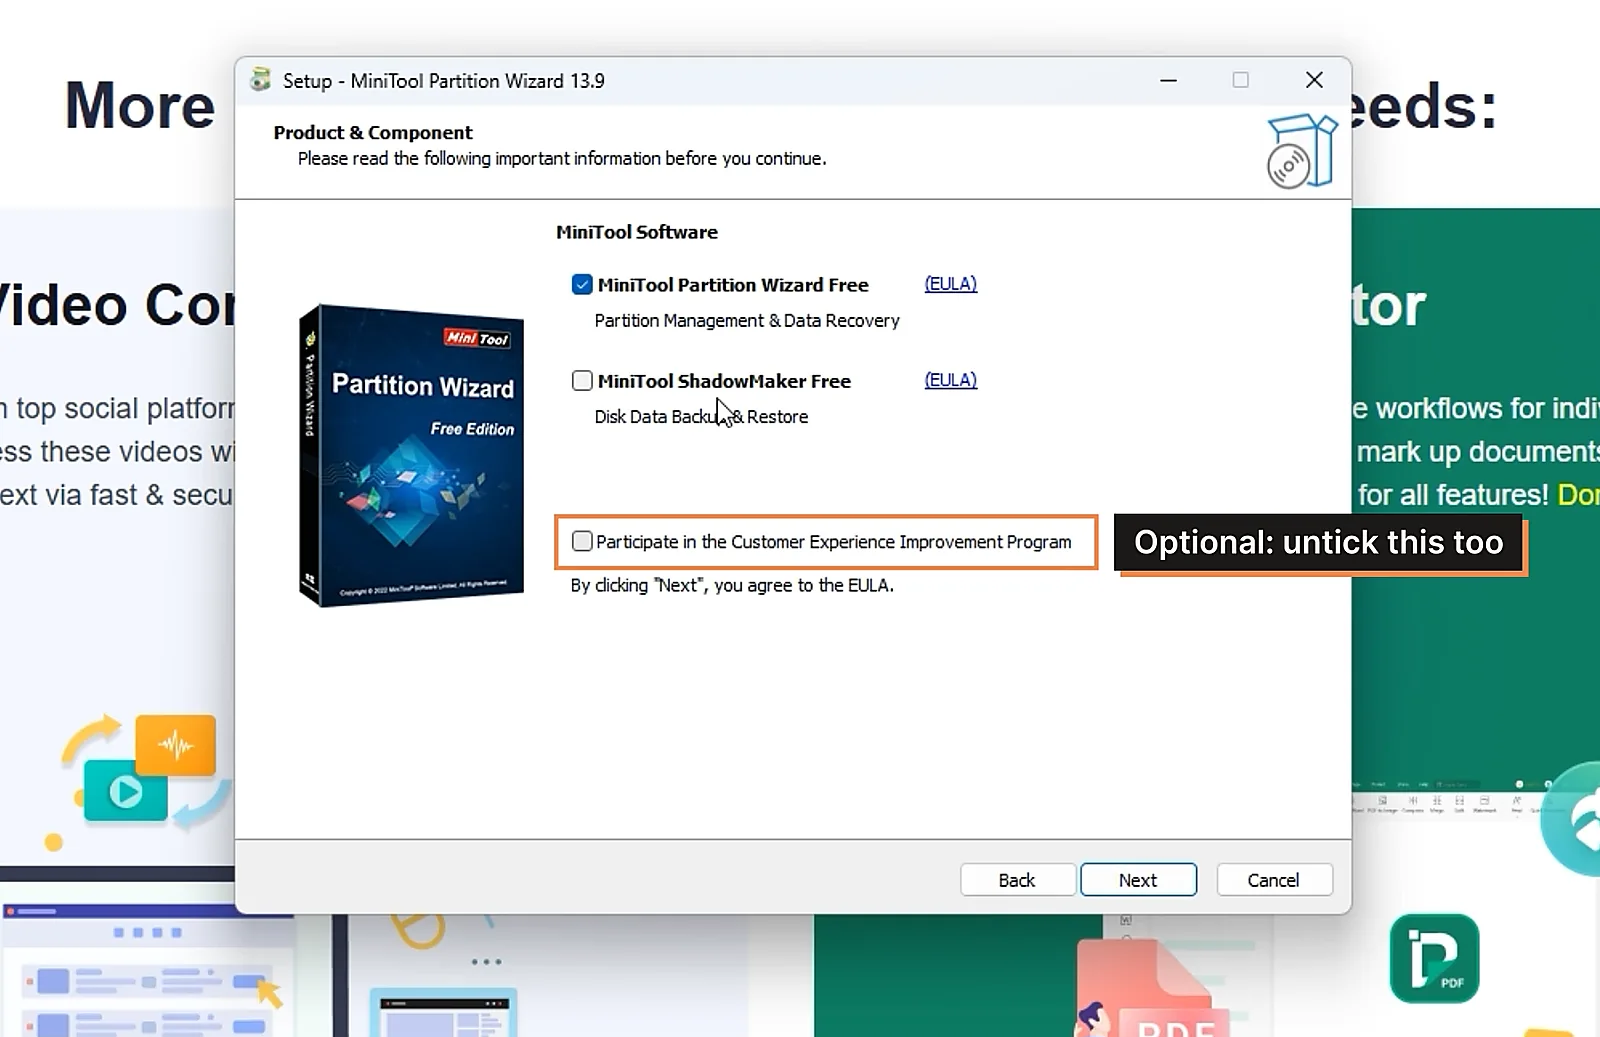
During installation, inspect optional components before clicking Next.
Step 3: Select the correct MBR disk
In Partition Management, locate the intended drive in the disk list. In the demonstration, the target is Disk 1 — TOSHIBA DT01ACA200, MBR, 1.82 TB. Its four volumes include F:Others, J:Software, G:Nid and I:Movies. The presence of those volumes makes it easier to confirm that the correct disk is selected.
Select the whole disk (the Disk 1 row), not just one of its partitions, then choose Convert MBR Disk to GPT Disk from the left-hand operations menu. If this option is absent or blocked, stop and check whether the disk is a system disk or otherwise unsupported by your edition.
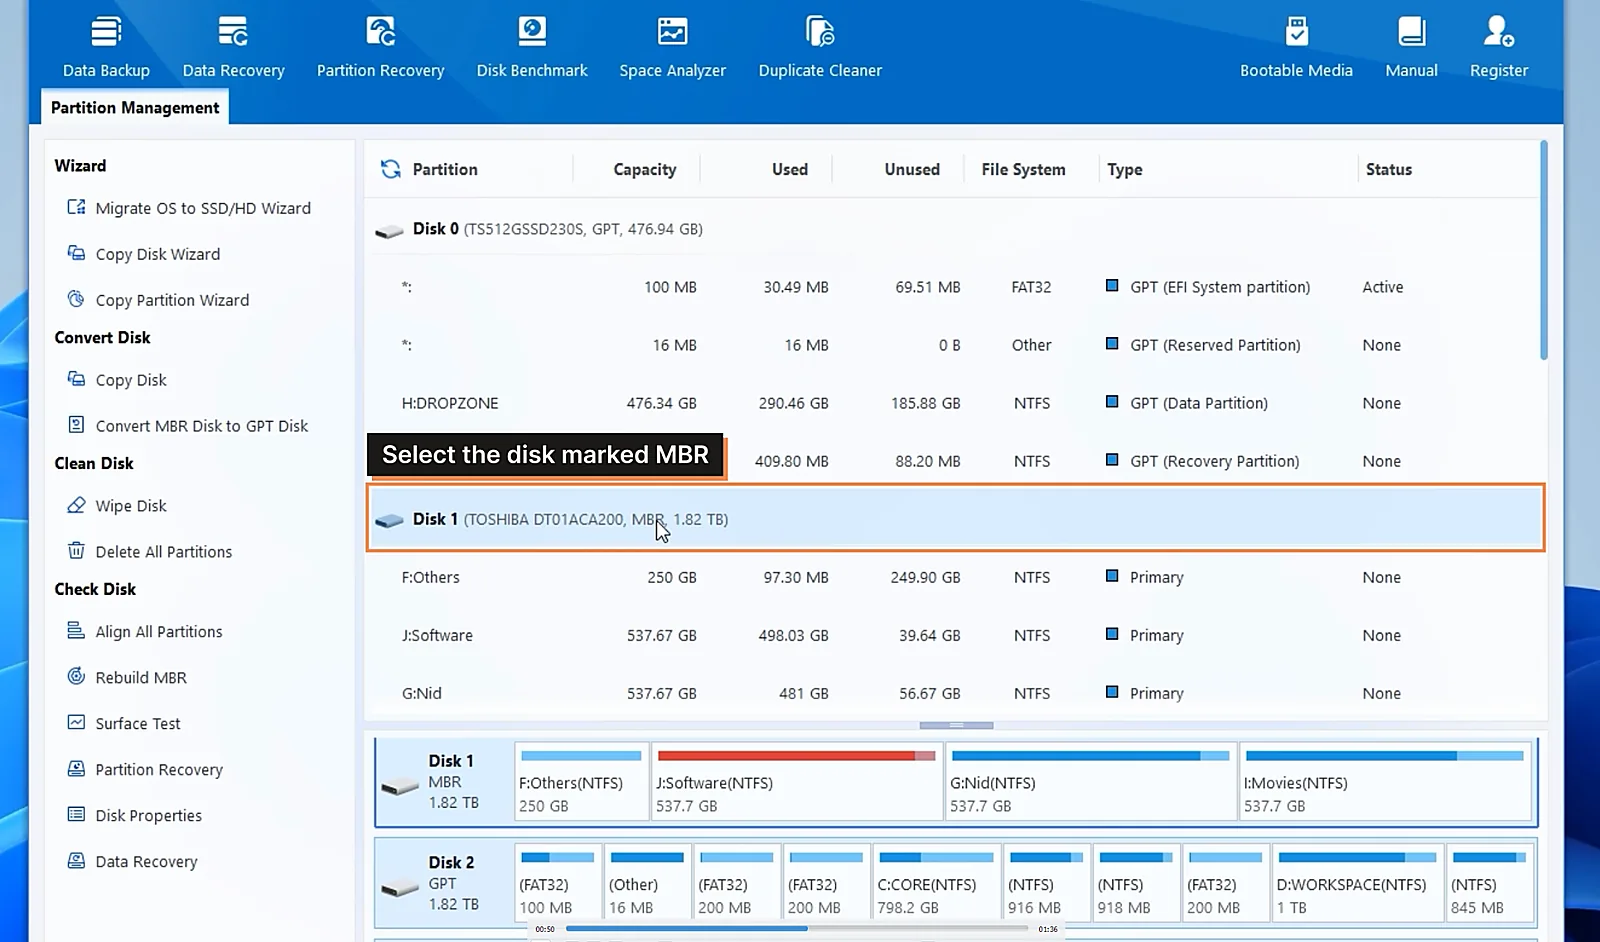
Before conversion: the selected Toshiba data drive is marked MBR and its existing partitions are visible.
Step 4: Click Apply and confirm
Choosing the conversion first queues an operation; it does not necessarily perform it immediately. In the video, I click Apply in the bottom-left corner and confirm Yes to begin. Wait for the software to finish. Do not disconnect the drive, restart Windows or interrupt power during the operation.
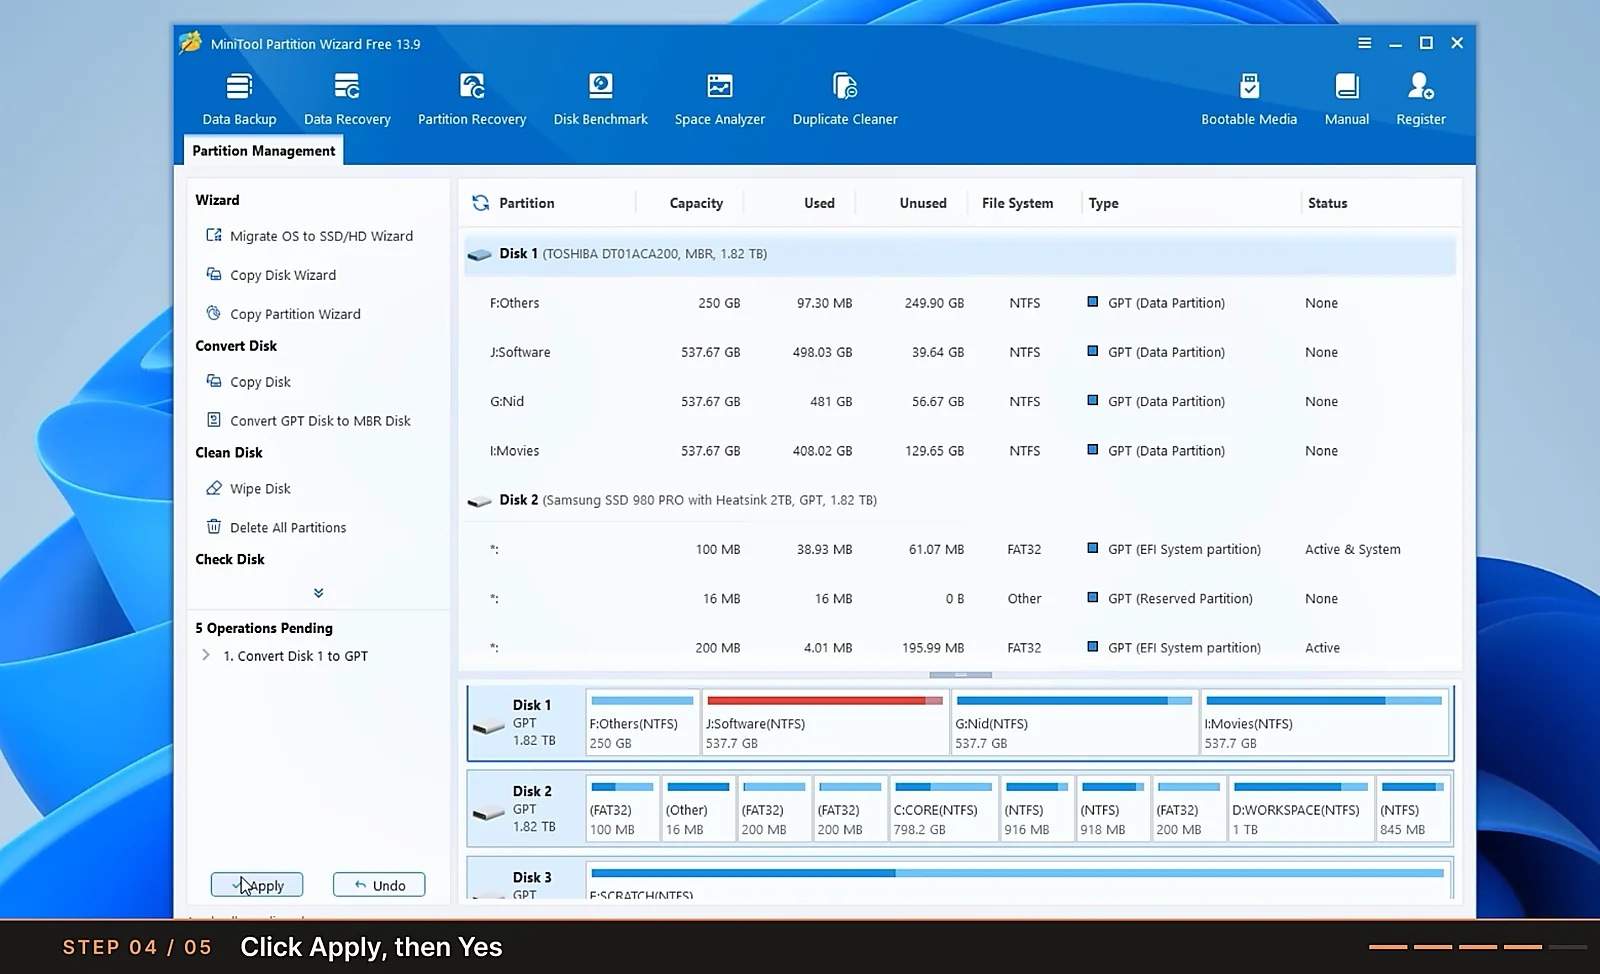
After choosing the conversion, click Apply and approve the confirmation to perform it.
Step 5: Confirm GPT and check your files
After the operation succeeds, inspect the same disk again. In my recording, Disk 1 now reads GPT and the same four NTFS volumes are still listed. Their displayed sizes and used-space values have not changed in the comparison shown. That confirms the conversion completed in the demonstration, but you should also open your own drive folders and check a few important files.
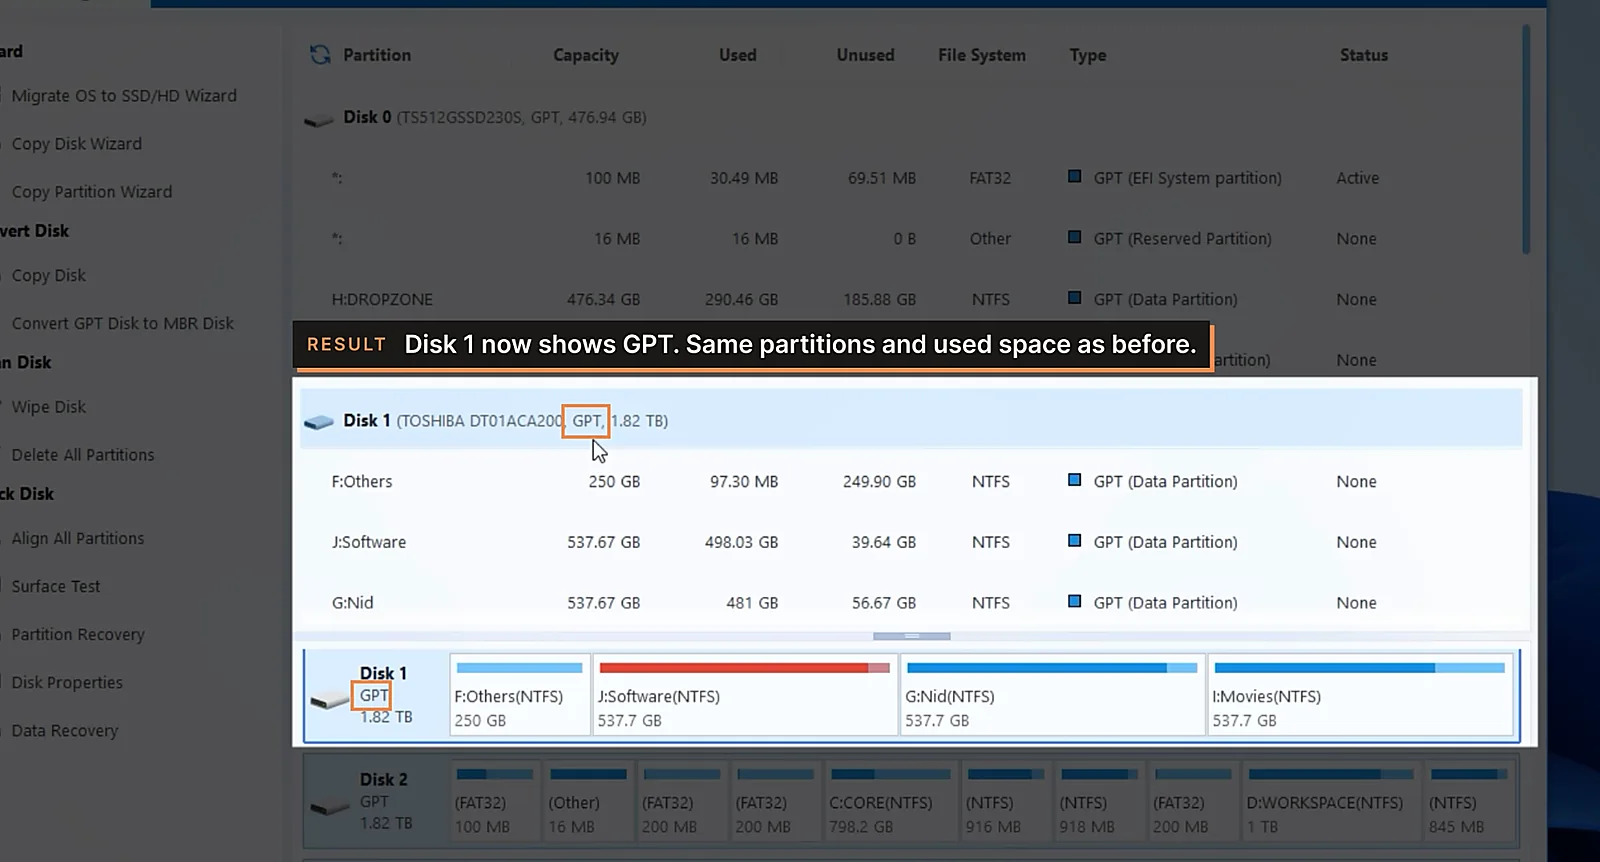
Result from the video: Disk 1 shows GPT while its existing data partitions remain visible.
If the option is unavailable
- It is your Windows boot disk: MiniTool's Free edition does not support OS-disk MBR-to-GPT conversion. For supported Windows installations, see the separate Microsoft MBR2GPT guide instead. That process has additional validation and UEFI boot requirements.
- The disk is already GPT: There is nothing to convert. Confirm that you selected the intended drive.
- The disk is encrypted, damaged or in use: Do not force changes. Back up your files, check disk health and consult the tool's documentation for that configuration.
Common questions
Does this delete or format my drive?
Not in the successful demonstration. MiniTool's conversion is designed to retain partitions on supported data disks, and the screenshots show the same volumes before and after. Always maintain a separate backup because disk operations carry risk.
Can I use this method on my Windows C: drive?
Not with the Free edition shown here. MiniTool identifies OS-disk conversion as a paid feature. A Windows boot disk also needs the correct boot setup after conversion; use a workflow specifically documented for system drives.
Does changing MBR to GPT enable Secure Boot?
No. Converting a data disk does not alter your PC's boot mode or switch on Secure Boot. If your goal is Windows 11 boot compatibility, read the Secure Boot guide and first check how Windows itself is installed and started.
Why does the title say two minutes?
The video demonstrates the main process in about two minutes. Installation and the actual conversion can take longer depending on download speed, hardware and disk state.
Official resources and related guides
MiniTool's official MBR-to-GPT instructions confirm that the Free edition is intended for data disks. For converting the Windows boot drive using a different method, read How to Convert MBR to GPT Without Losing Data (MBR2GPT). If you are preparing for Windows 11, our Secure Boot guide explains the firmware side.
Final precaution: Back up critical data, verify the disk model and capacity, and review any confirmation dialog before applying a partition-table change.
Keep going