How to Convert MBR to GPT Without Losing Data
MBR, GPT, Legacy and UEFI explained in plain words, then how to convert your Windows drive to GPT with Microsoft's own tool and switch to UEFI without losing files.
 Mohammad Shojib AhmedUpdated · 8 min read · 151K views
 7:04 video
Key takeaway
Use Windows’ own MBR2GPT tool, then switch your BIOS to UEFI. No reinstall, no lost files.
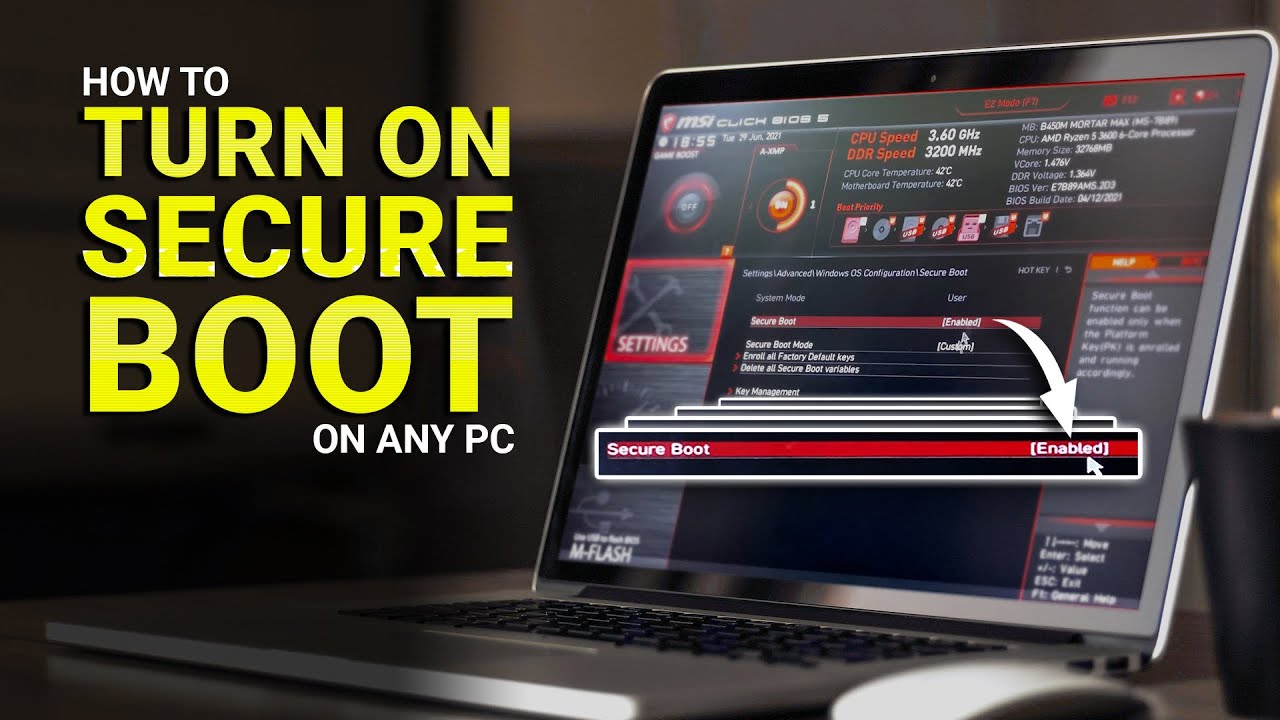
If you turned on Secure Boot for Windows 11 and your PC keeps going back to the BIOS instead of starting Windows, an old MBR system drive is the most common cause. Secure Boot needs UEFI, and UEFI needs a GPT drive. Check your drive first, though: a wrong boot order or a missing UEFI boot entry can cause the same loop.
Here is how I converted my drive from MBR to GPT with Windows' own MBR2GPT tool, without losing a single file. I have used this on three PCs. I also explain what all these letters mean, because once you understand them, the steps make a lot more sense.
MBR, GPT, Legacy and UEFI in plain words
Every drive has a small map at the start that tells the computer how the drive is divided and where to find the operating system. There are two styles of map:
- MBR (Master Boot Record) is the old style from the 1980s. It works, but it has limits, such as a 2 TB maximum size.
- GPT (GUID Partition Table) is the modern style. It supports huge drives and keeps a backup copy of the map.
Your motherboard also has two ways of starting a PC:
- Legacy, also called CSM, is the old way. It can only start MBR drives.
- UEFI is the modern way. It starts GPT drives, and it is the only mode where Secure Boot works.
So the chain is simple: Windows 11 wants Secure Boot, Secure Boot needs UEFI, and UEFI needs GPT. If your drive is MBR, you convert it to GPT, then switch the BIOS from Legacy to UEFI.
Tip: Back up anything important first. MBR2GPT is built into Windows and is designed to keep your files on a supported drive, but it changes how your drive starts up, so a backup is cheap insurance.
What you need
- Windows 10 (version 1703 or newer) or Windows 11.
- An administrator account.
- Access to your BIOS, and a PC that supports UEFI. Most PCs from the last decade do. Check before you convert: afterwards the drive can only start in UEFI mode, and Microsoft notes the change cannot be undone.
- No more than three partitions on the Windows drive. MBR2GPT needs room to add one small startup partition.
- If you use BitLocker or device encryption, save your recovery key and suspend protection first (Control Panel, then BitLocker Drive Encryption, then Suspend protection). Microsoft notes that after the conversion the existing BitLocker protectors must be deleted and recreated before you resume it.
Step 1: Check that your drive is MBR
- Right-click Start and open Disk Management.
- Right-click the disk Windows is on (usually Disk 0, not a partition) and choose Properties.
- Open the Volumes tab. If Partition style says Master Boot Record (MBR), carry on.
You can also check how the PC is starting. Press Windows + R, type msinfo32 and press Enter. Next to BIOS Mode, Legacy means you are on the old system, and UEFI means you are already on the new one.
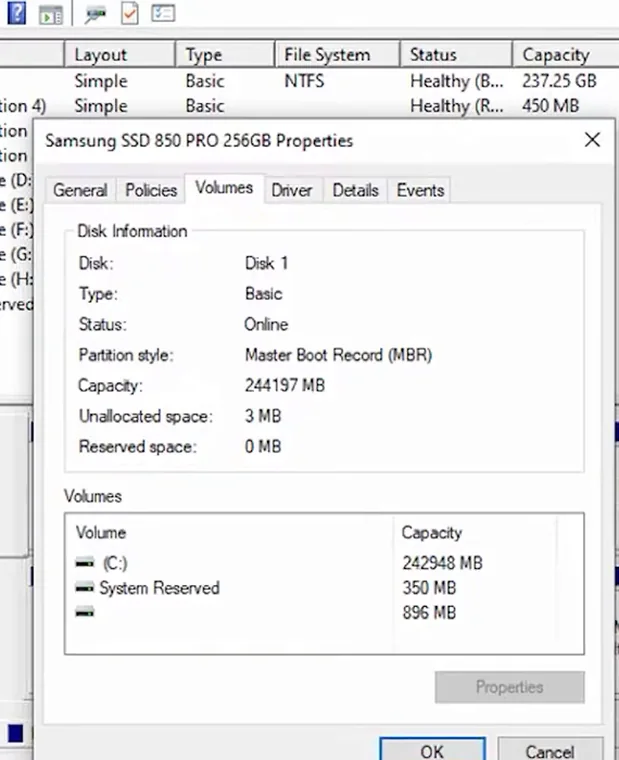
From my video at 2:31: Disk Management → disk Properties → Volumes: Partition style is Master Boot Record (MBR).
Step 2: Convert the drive to GPT
- Search for cmd, right-click Command Prompt and choose Run as administrator.
- Check the disk first (an extra safety step, not shown in my video): type
mbr2gpt /validate /allowFullOSand press Enter. This only checks the drive and changes nothing. Continue only if you see "Validation completed successfully". - Run the conversion, as in the video:
mbr2gpt /convert /allowFullOS - Wait a minute or two. You should see "Conversion completed successfully" and a second line: "Before the new system can boot properly you need to switch the firmware to boot to UEFI mode." In the video I checked Disk Management at this point, before restarting: Partition style now showed GPT and my files were still there.
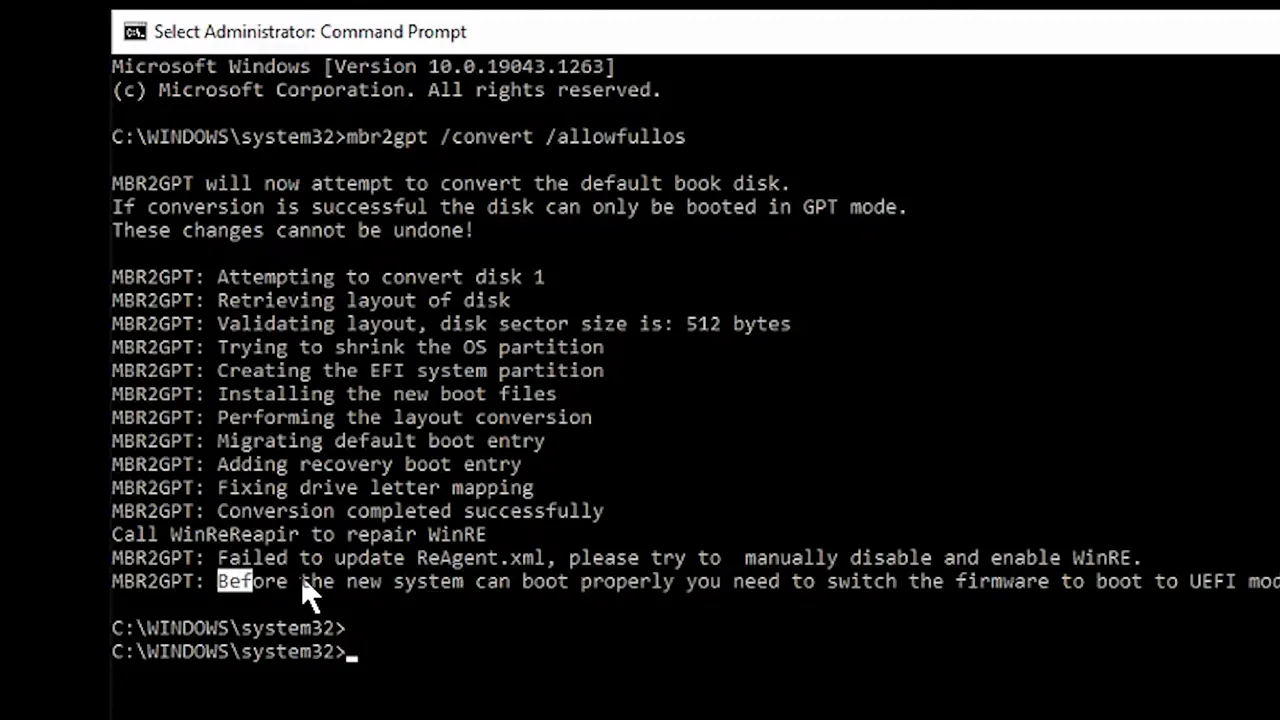
From my video at 3:40: mbr2gpt /convert /allowfullos ends with “Conversion completed successfully” and a reminder to switch the firmware to UEFI.
The /allowFullOS part simply allows the tool to run from inside Windows. Without it, the tool expects to be run from the Windows recovery environment.
Do not try to start Windows in the old Legacy mode now. Restart and go straight into the BIOS for Step 3.
If validation fails
- Disk layout validation failed usually means there are too many partitions. MBR2GPT writes the exact reason to
setuperr.login your Windows folder. Open Disk Management and look for extra partitions, such as an old recovery partition from the PC maker, but do not delete one just to get past the error unless you know what is on it. - Cannot find OS partition can happen when the drive was cloned or has an unusual layout. Running the tool from the recovery environment sometimes helps.
- Run the validate command again after each change. Only run the convert command when validation succeeds.
Step 3: Switch your BIOS to UEFI
Restart and keep pressing Delete (F2 on some boards) to open the BIOS. Menu names vary by brand. On my board it looked like this:
- Open Boot, then CSM (Compatibility Support Module).
- Set Boot Device Control to UEFI Only.
- Set Boot from Storage Devices to UEFI driver first. This one matters most: if storage is not on UEFI, Windows will not start.
- Leave Boot from Network Devices and PCI-E Expansion Devices on Legacy only.
- Press F10 to save and restart.
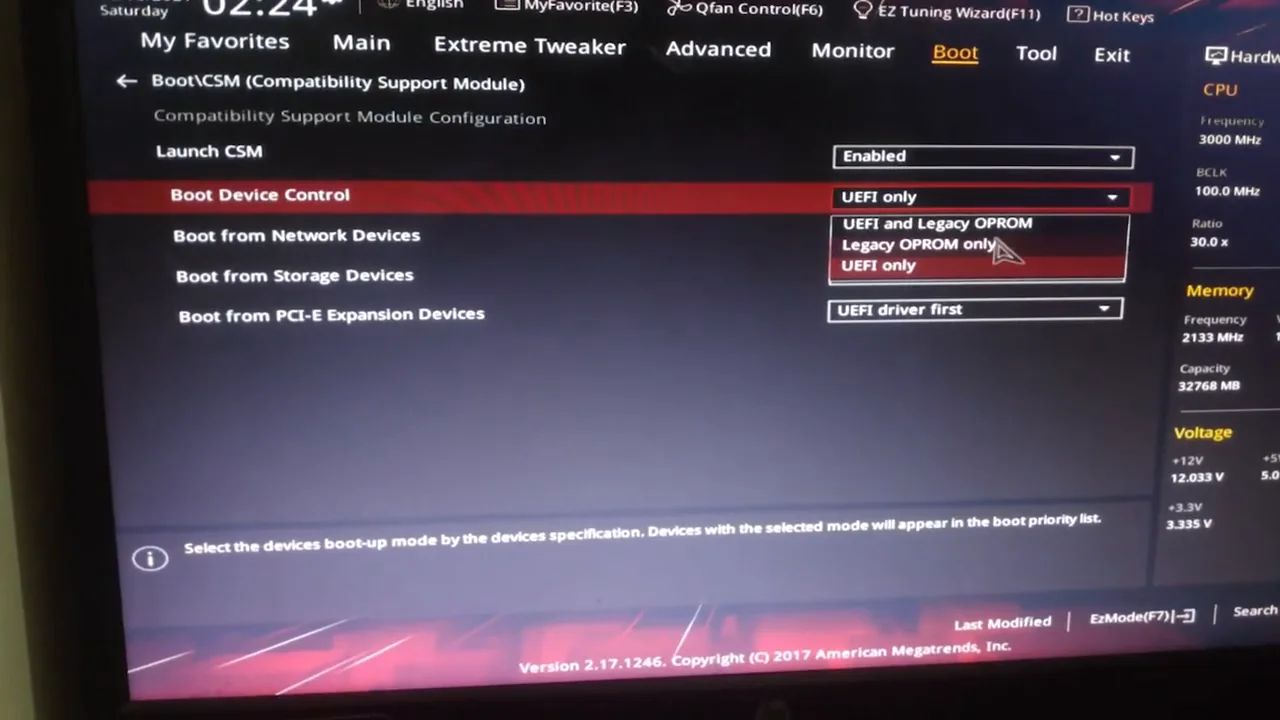
From my video at 4:32: In the BIOS in my video: Boot → CSM, Boot Device Control changed to UEFI only.
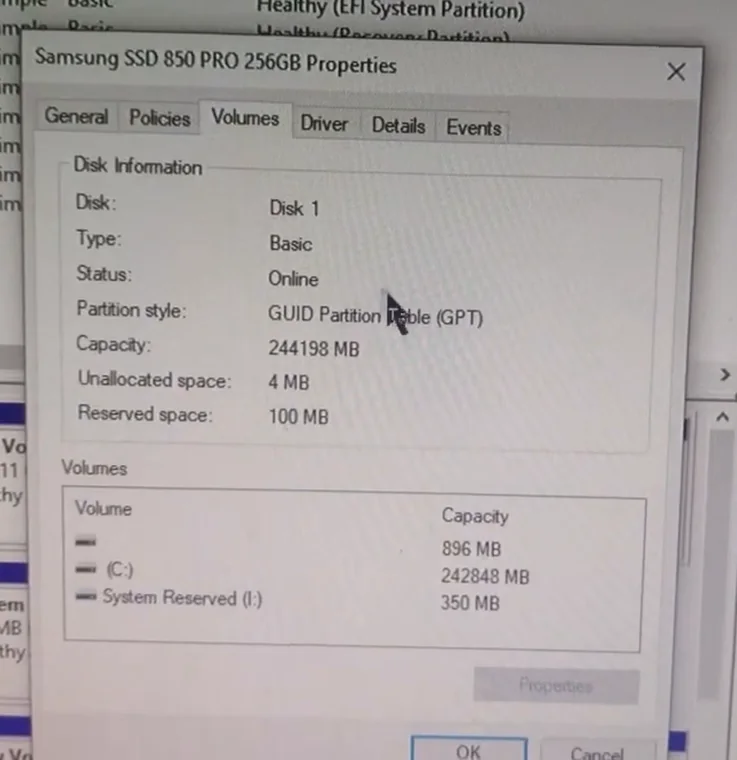
From my video at 5:42: Back in Windows, the same disk now shows GUID Partition Table (GPT).
On some boards the simplest version is a single option: set CSM to Disabled. That switches the whole board to UEFI.
Windows should now start normally. To confirm, press Windows + R, type msinfo32 and check that BIOS Mode says UEFI; Disk Management will show GUID Partition Table (GPT). You can now turn on Secure Boot. If you use BitLocker, recreate its protectors and resume it as Microsoft describes before relying on encryption again.
If you get a blue screen
It usually means the PC cannot find the drive to boot from yet. First check that UEFI mode is on and Windows Boot Manager is the first boot option. In the video, this is what fixed it for me: turn the PC off for a few minutes, go back into the BIOS, choose Load defaults (restore defaults), restart, then set UEFI mode again as above. Before loading defaults, note your storage settings (SATA, RAID or VMD mode), because defaults can change them. If Windows still does not start, stop there and use Windows recovery media or ask a technician, rather than running more conversion or repair tools.
Why I only use Microsoft's tool now
Before I found MBR2GPT, I tried a third-party partition tool for the same job, and it broke my Windows install. I wrote about that in what happened when a third-party tool cost me my Windows install. MBR2GPT is built into Windows, it checks the drive before changing anything, and it has worked every time I have used it.
Common questions
What does “Disk layout validation failed” mean?
The drive does not meet one of MBR2GPT’s checks. The most common reasons are more than three primary partitions or an extended/logical partition. The exact reason is in setuperr.log in your Windows folder. See if validation fails.
Can I undo the conversion?
Not with MBR2GPT. Microsoft notes the changes cannot be undone, and the drive can then only start in UEFI mode. That is why you should check the PC supports UEFI and make a backup first.
Will converting MBR to GPT delete Windows?
Not with MBR2GPT on a supported drive. Third-party tools are riskier. I lost a Windows install that way: what happened.
The short version
Back up first, check that your drive is MBR, run mbr2gpt /validate, then mbr2gpt /convert, and switch the BIOS from Legacy to UEFI before you start Windows again. After that, Secure Boot and Windows 11 are within reach.
Official guidance: Microsoft: MBR2GPT
Precaution
“Without data loss” describes how MBR2GPT is designed to work and what happened on my PCs. It is not a guarantee: power cuts, failing drives or unusual layouts can still go wrong. Keep a verified backup and your BitLocker recovery key before any partition change.
Keep going